
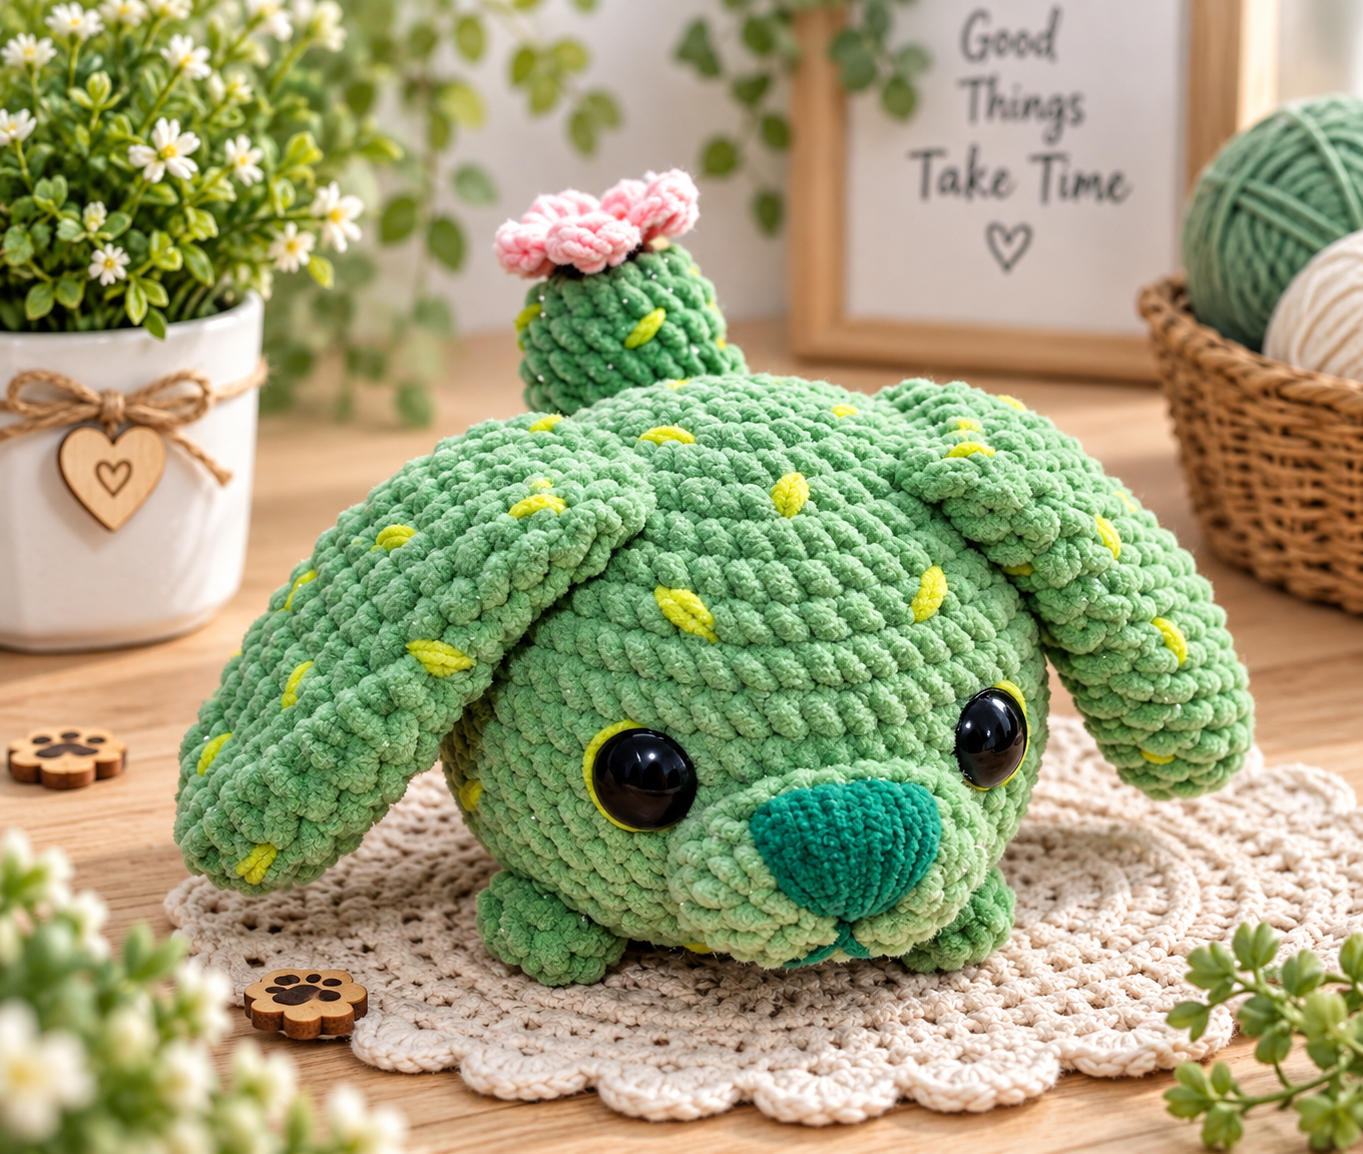
Learn how to crochet an adorable green small dog using soft velvet yarn. This free, beginner-friendly amigurumi pattern includes step-by-step instructions from start to finish.
Introduction
Crocheting plush toys with velvet yarn brings a special level of softness and charm to every handmade creation. If you are looking for a fun, creative, and unique project, this Green Small Dog amigurumi pattern is a perfect choice.
Stepping away from traditional puppy colors, this vibrant green design adds a playful personality to your handmade collection. The thick, plush texture makes it quick to work up while creating a dense, huggable finish. Whether you are crafting a gift, expanding your amigurumi portfolio, or simply practicing your stitches, follow along with the clear, row-by-row instructions below to begin crafting your own little companion.
Materials
- Velvet yarn (4mm): Green, Brown
- Crochet hook: 4.5 mm
- Round plastic safety eyes: 16 mm
- Polyfill stuffing
- Yarn needle
- Scissors
- Hot glue (optional for securing details)
Abbreviations (US Terms)
- MR: Magic Ring
- ch: Chain stitch
- sc: Single crochet
- inc: Increase (2 single crochet stitches in the same stitch)
- sc together: 3 single crochet stitches worked into the same stitch
- dec: Decrease (single crochet 2 stitches together)
- sl / sl st: Slip stitch
- hdc: Half double crochet stitch
- [ … ] * X: Repeat the instructions inside the brackets X times
- (X): Total stitch count at the end of the round
Pattern Instructions
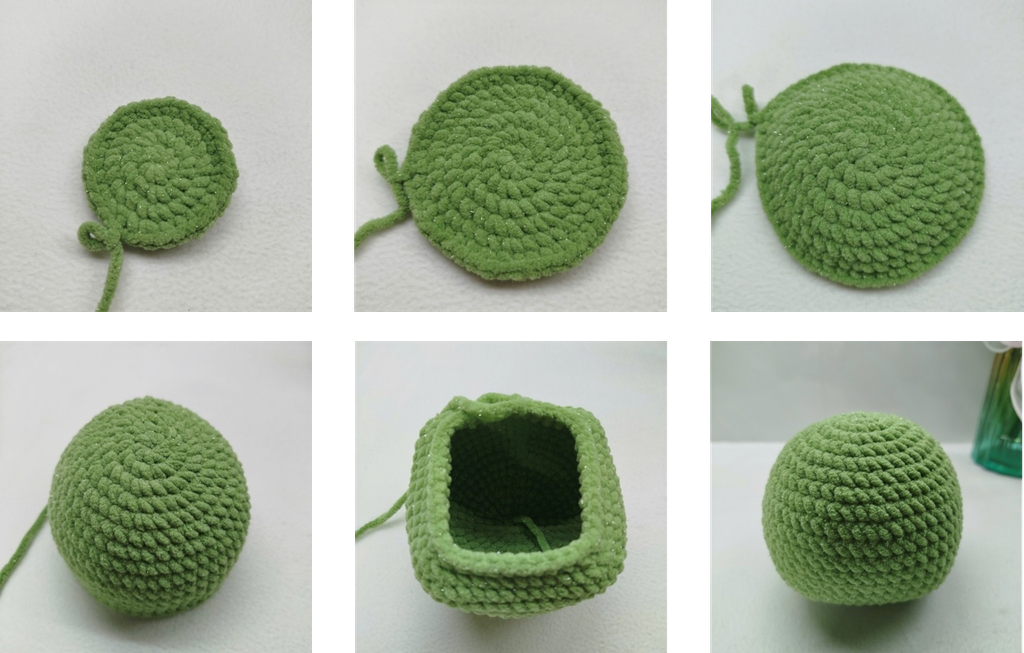
1. Main Body (Green)
- Row 1: 8 sc in MR (8)
- Row 2: 8 inc (16)
- Row 3: [1 sc, 1 inc] * 8 (24)
- Row 4: [1 sc, 1 inc, 1 sc] * 8 (32)
- Row 5: [3 sc, 1 inc] * 8 (40)
- Row 6: 40 sc (40)
- Row 7: [2 sc, 1 inc, 2 sc] * 8 (48)
- Row 8: [5 sc, 1 inc] * 8 (56)
- Rows 9–15: 56 sc (56)
- Row 16: 5 sc, 2 dec, 10 sc, 2 dec, 10 sc, 2 dec, 10 sc, 2 dec, 5 sc (48)
- Row 17: 4 sc, 2 dec, 8 sc, 2 dec, 8 sc, 2 dec, 8 sc, 2 dec, 4 sc (40)
- Row 18: 3 sc, 2 dec, 6 sc, 2 dec, 6 sc, 2 dec, 6 sc, 2 dec, 3 sc (32)
- Row 19: 2 sc, 2 dec, 4 sc, 2 dec, 4 sc, 2 dec, 4 sc, 2 dec, 2 sc (24)
- Row 20: 1 sc, 2 dec, 2 sc, 2 dec, 2 sc, 2 dec, 2 sc, 2 dec, 1 sc (16)
- Row 21: 8 dec (8)
Stuff the body firmly with polyfill before closing. Fasten off and cut the yarn.
2. Snout (Green)
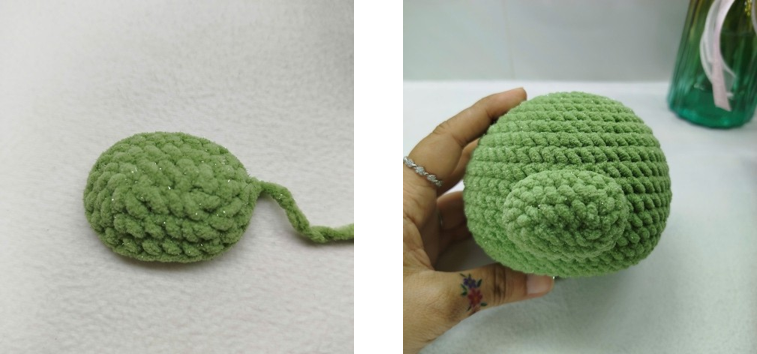
- Row 1: Ch 5, starting in the 2nd chain from the hook: 1 inc, 2 sc, 4 sc together in the last chain, 2 sc down the opposite side, 1 inc (12)
- Row 2: 2 inc, 2 sc, 4 inc, 2 sc, 2 inc (20)
- Row 3: 20 sc (20)
Assembly Note:
Fasten off and cut the yarn, leaving a long tail for sewing. Lightly stuff the snout with polyfill and sew it securely onto the main body.
. Ears (Make 2 – Green Yarn)
- Row 1: Ch 6, starting in the 2nd chain from the hook: 3 sc, 3 sc together in the last chain, 3 sc along the opposite side, 1 inc (12)
- Row 2: 1 inc, 3 sc, 3 inc, 3 sc, 2 inc (18)
- Row 3: [8 sc, 1 inc] * 2 (20)
- Rows 4–7: 20 sc (20)
- Row 8: [8 sc, 1 dec] * 2 (18)
- Row 9: 18 sc (18)
- Row 10: [7 sc, 1 dec] * 2 (16)
- Row 11: 16 sc (16)
- Row 12: [6 sc, 1 dec] * 2 (14)
- Row 13: 14 sc (14)
- Row 14: Flatten the opening and crochet 7 sc through both layers to close the edge (7)
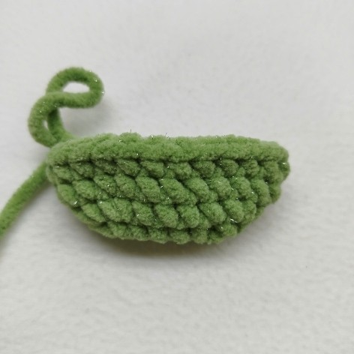
Fasten off and cut the yarn, leaving a long end for sewing.
Assembly and Facial Details
- Attach Ears: Sew the two ears onto the top of the head between Rows 4 and 5.
- Embroider Details: Use lemon yellow yarn to add decorative accent stitches or freckles on the face/body.
- Embroider Nose and Mouth: Using dark green yarn, embroider a small triangular nose and stitch the mouth line directly onto the snout.
- Attach Eyes: Securely attach or glue the 16 mm plastic eyes to the main body just above the snout.
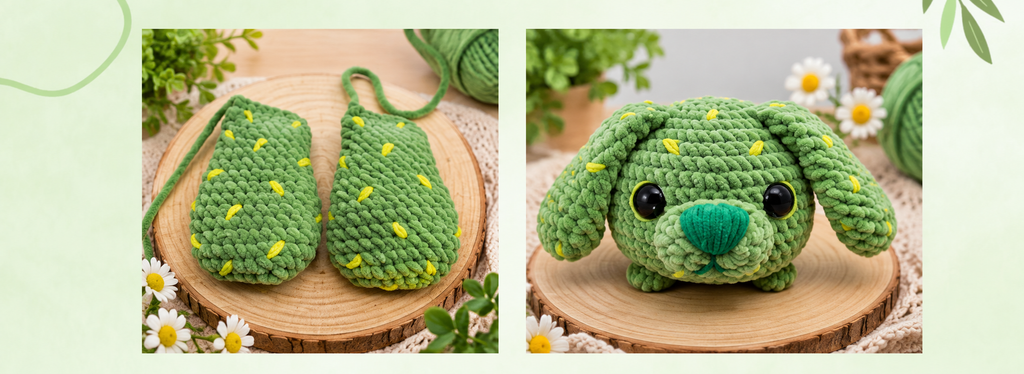
4. Legs (Make 4 – Green Yarn)
- Round 1: 7 hdc in Magic Ring (7)
Fasten off and cut the yarn, leaving a long tail for sewing.
Leg Assembly
- Position the 4 legs evenly on the underside of the main body (towards the four corners/base).
- Sew each leg securely in place using the yarn tail, or attach them using hot glue for a firm hold.
5. Tail (Green Yarn)
Main Tail:
- Row 1: 6 sc in MR (6)
- Row 2: 6 inc (12)
- Row 3: [3 sc, 1 inc] * 3 (15)
- Row 4: [2 sc, 1 inc, 2 sc] * 3 (18)
- Rows 5–7: 18 sc (18)
- Row 8: [2 sc, 1 dec, 2 sc] * 3 (15)
- Row 9: [3 sc, 1 dec] * 3 (12)
- Rows 10–20: 12 sc (12)
Fasten off and cut the yarn, leaving a long end for sewing. Lightly stuff the tail.
Tail Branches (Make 2 – Green Yarn):
- Row 1: 6 sc in MR (6)
- Row 2: 5 sc, 1 inc (7)
- Row 3: 7 sc (7)
- Row 4: 3 sc, 2 dec (5)
Fasten off and cut the yarn, leaving a long tail for sewing.
Tail Assembly:
- Sew the 2 small branches onto the sides of the main tail.
- Use lemon yellow yarn to embroider accent stitches on the tail.
- Sew the completed tail securely to the back of the main body.
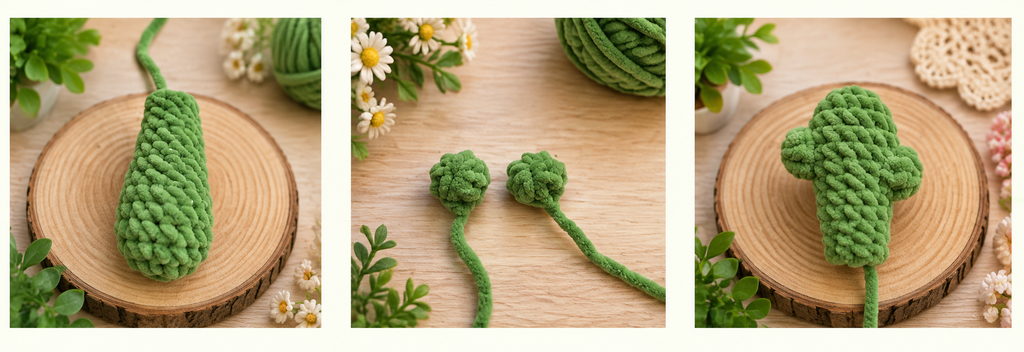
6. Flower (Pink Yarn)
Work all stitches inside a Magic Ring:
- Petal pattern: [ch 2, 1 hdc, ch 2, sl st into the Magic Ring] * repeat 5 times total to create a 5-petal flower.
Pull the Magic Ring tightly to close the center hole. Fasten off and cut the yarn, leaving a short tail for sewing (or trim if using glue).
Final Assembly & Details
- Flower Attachment: Sew or glue the pink flowers onto the green tail near the branches as decorative accents.
- Final Tail Attachment: Position the completed tail at the lower back of the main body, ensuring it is centered, and sew it firmly in place using the yarn tail.
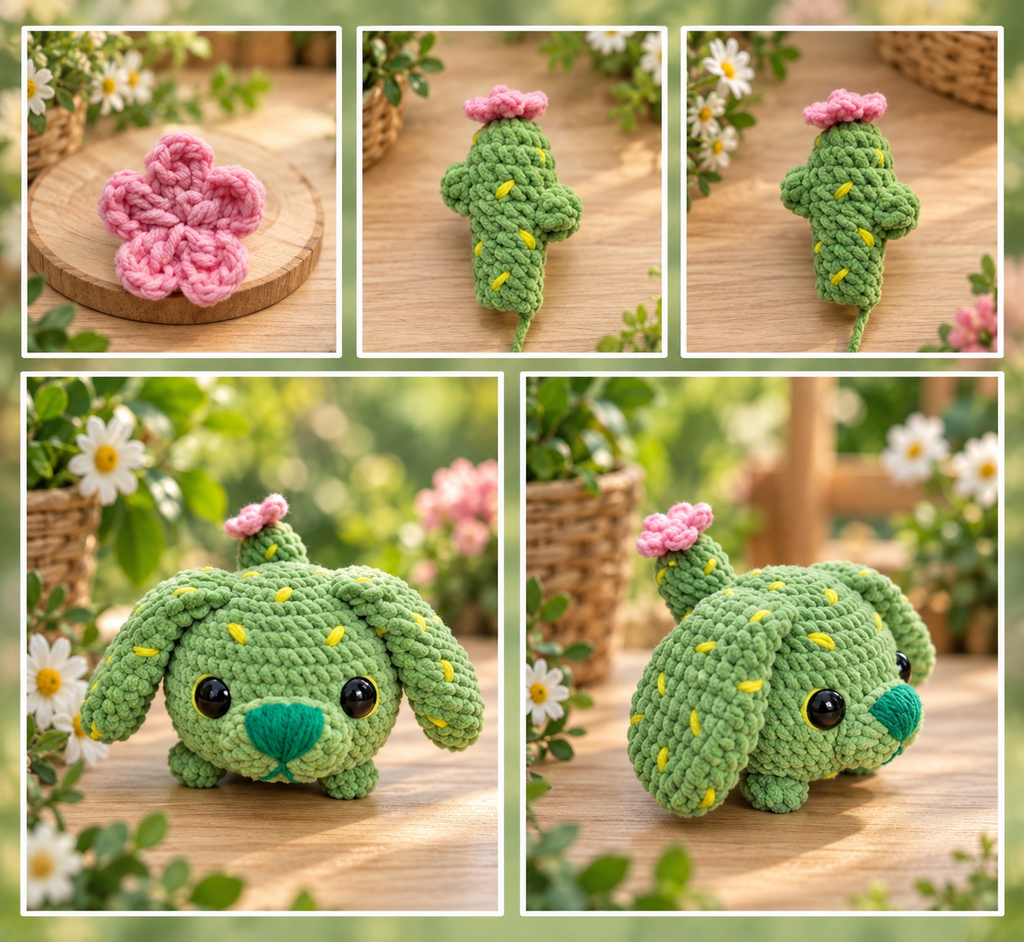
Conclusion & Helpful Tips
Caring for Velvet Amigurumi
Velvet and chenille yarns give amigurumi toys an extraordinarily soft feel, but they require gentle care to maintain their texture and shape over time. To clean your finished plush toy, spot cleaning with a damp cloth and mild soap is strongly recommended. If a full wash is necessary, place the toy in a mesh laundry bag, hand wash in cool water, and avoid wringing or twisting. Always let your amigurumi air dry flat on a clean towel away from direct heat to preserve the plush fibers and stitch definition.
Creative Customization Ideas
One of the most rewarding aspects of handmade crochet is the ability to personalize every detail to match your unique vision:
- Color Variations: While moss or pastel green gives this pup a whimsical, botanical look, you can experiment with pastel lavender, buttercup yellow, or classic cream and brown combinations.
- Floral Accents: You can make multiple small flowers in contrasting shades such as white, lilac, or peach to create a full floral wreath along the tail or around the puppy’s ear.
- Accessory Additions: Consider adding a tiny crocheted collar, a mini bell, or embroidered blush cheeks to give your toy even more expressive character.
Sharing and Community
Handmade crochet toys carry a sense of connection, creativity, and love that mass-produced items simply cannot duplicate. Whether this little green pup is destined to become a cherished nursery decoration, a thoughtful birthday present, or a comforting desk companion, making it stitch by stitch is an enjoyable creative journey.
If you enjoyed making this project, remember to save this pattern to your favorite Pinterest crochet boards or bookmark it for your next crafting session. We would love to see how your finished creation turns out, so feel free to share your photos and tag your work on social media. Happy crocheting, and enjoy bringing your new plush friend to life!