
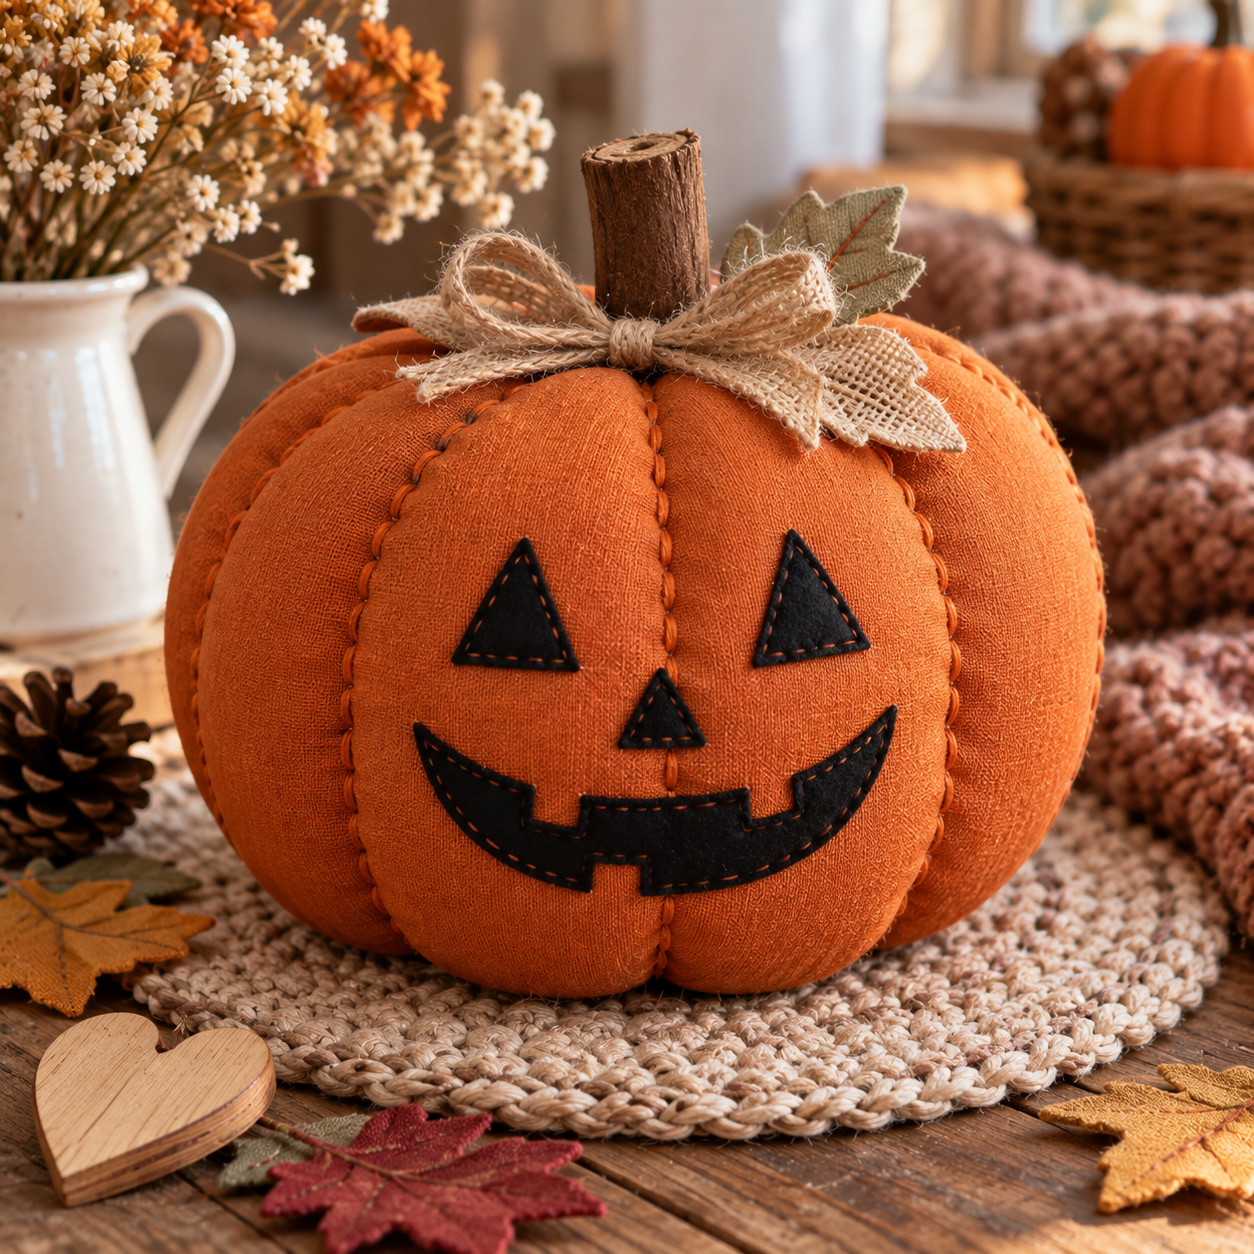
There’s something irresistibly cozy about a handmade fabric pumpkin sitting on a mantel, a porch table, or tucked into a Halloween gift basket. Unlike store-bought decorations, a DIY Halloween pumpkin plush is soft, personal, and endlessly customizable you choose the fabric, the size, the face, and every little detail. Best of all, it uses the exact same beginner-friendly sewing method as any other plush project: cut, sew, stuff, and decorate. No carving, no mess, and it lasts every single Halloween season after season.
In this complete step-by-step guide, you’ll learn exactly how to sew your own fabric pumpkin from start to finish including the simple trick that gives it that classic ridged, segmented pumpkin shape without any complicated pattern pieces. Whether you’re making one as a fall home accent, a Halloween gift, or a whole patch of pumpkins in different sizes, this tutorial has you covered.
Why Make Your Own Fabric Pumpkin?
A handmade pumpkin plush isn’t just a fun seasonal craft it’s a project with real staying power:
- Reusable year after year unlike a real pumpkin, it never rots or needs to be tossed after Halloween.
- Budget-friendly made from fabric scraps and stuffing you likely already have on hand.
- Fully customizable pick any fabric, from classic orange cotton to plaid flannel, velvet, or even burlap for a rustic farmhouse look.
- Beginner-friendly no advanced sewing skills required, just straight stitches and a bit of patience.
- A thoughtful handmade gift perfect for fall gift baskets, teacher gifts, or a cozy addition to a Halloween-themed care package.
Materials You’ll Need
- Soft fabric in orange (or your preferred pumpkin color cream, black, plaid, or velvet all work beautifully)
- A small scrap of brown or green fabric, or felt, for the stem
- A circular sewing pattern (template) roughly 20–25 cm in diameter
- Scissors (fabric scissors recommended)
- Straight pins
- Needle and thread, or a sewing machine
- Polyester stuffing (or cotton balls, fabric scraps, or yarn as alternatives)
- A wooden spoon or similar tool for pushing stuffing into tight spots
- Strong thread or embroidery floss (for creating the ridged pumpkin shape)
- A long doll needle or upholstery needle (for shaping the ridges)
- Fabric marker or pen (for the face)
- Buttons or felt scraps (optional, for eyes and mouth)
- Fabric glue or a hot glue gun (optional)
- A small twig, cinnamon stick, or wrapped pipe cleaner for the stem (optional, for extra realism)
For a finished pumpkin about 20 cm wide, you’ll need roughly 0.3 meters of fabric.
Step 1: Cutting the Fabric
Choose your fabric. Orange cotton or felt gives the most classic pumpkin look, but don’t be afraid to experiment plaid flannel, mustard yellow, or cream fabric all create a beautiful modern farmhouse-style pumpkin. Make sure your fabric isn’t too stretchy, since a stable fabric holds the ridged shape much better later on.
Draw or print your circle pattern. Unlike a teddy bear or bunny, a fabric pumpkin starts from a simple circle no complicated limbs or ears to worry about. Draw a circle template on paper using a plate, a compass, or a printable pattern found online. A 20–25 cm diameter circle makes a nice medium-sized pumpkin.
Cut out the pattern. Cut along the drawn circle carefully with sharp scissors, keeping the edge as smooth and round as possible. Discard the excess paper once done.
SEO Tip for crafters: Keeping your circle perfectly round matters more here than in other plush projects any lumps or flat spots will show once the pumpkin is gathered into ridges later.
Fold the fabric and pin the pattern. Fold your fabric in half, smooth out any wrinkles, and pin the circle pattern on top so both layers stay aligned while cutting. Insert a pin every 5–7 cm around the edge.
Cut the fabric. Cut slowly and evenly along the pattern’s edge using sharp fabric scissors. Once finished, remove the pattern from the fabric and set it aside you’ll want it again if you’re making a whole patch of pumpkins in different sizes.
Step 2: Sewing the Pumpkin Together
Pin the fabric pieces together. Place your two fabric circles together with the right (outer) sides facing inward. Align the edges evenly and pin every 5–7 cm around the circle. Leave an 8 cm gap unpinned along one section this opening will let you turn the pumpkin right-side out and stuff it later.
Sew along the edges. Using a sewing machine set to a straight stitch, or hand-stitching with all-purpose thread, sew around the circle, keeping about 1.25 cm of seam allowance. Leave the marked gap open, and remove the pins as you go.
Clip the seam allowance. Once finished sewing, use sharp scissors to make small notches all the way around the curved edge this is especially important on a circle, since it helps the fabric lie perfectly smooth and round once turned right-side out.
Turn the pumpkin right-side out. Use the opening to reach inside and pull the fabric through to the right side. A wooden spoon handle helps smooth out the rounded edge fully.
Stuff the pumpkin firmly. Unlike a soft cuddly bear, a fabric pumpkin looks best firmly stuffed this gives it the rounded, slightly plump shape needed for the ridges to hold well later. Push stuffing evenly from the center outward using a wooden spoon to avoid lumps.
Close the gap. Fold the raw edges of the opening inward and press them together, securing with 2–3 pins.
Hand-stitch the opening closed. Thread a needle with matching thread and knot the end. Stitch back and forth across the gap using small, even stitches until fully closed, then knot off and trim the excess thread. Remove any remaining pins.
Step 3: Creating the Classic Ridged Pumpkin Shape
This is the step that transforms a plain stuffed circle into an unmistakable pumpkin and it’s much easier than it looks.
Thread a long doll needle with strong thread or embroidery floss, and knot the end securely.
Push the needle straight through the center of the stuffed pumpkin, from the bottom to the top, pulling it all the way through.
Loop the thread over the top edge and push the needle back down through the center to the bottom, coming out right next to where you started.
Pull the thread firmly to create a gentle indentation from top to bottom this is your first “ridge” line. Knot it off at the bottom.
Repeat this process 5–8 times evenly around the pumpkin, spacing each ridge line evenly apart, until you have a full segmented, ridged pumpkin shape all the way around.
Tip: Pull each ridge with even tension for a symmetrical look. Firmer stuffing holds the ridges much more crisply than soft, loose stuffing.
Step 4: Adding the Stem and Face
Attach the stem. Cut a small rectangle of brown or green felt and roll it into a tube shape, or use a real cinnamon stick, small twig, or a wrapped brown pipe cleaner for extra realism. Hand-stitch or hot-glue the stem securely into the center top of the pumpkin, where all the ridge lines meet.
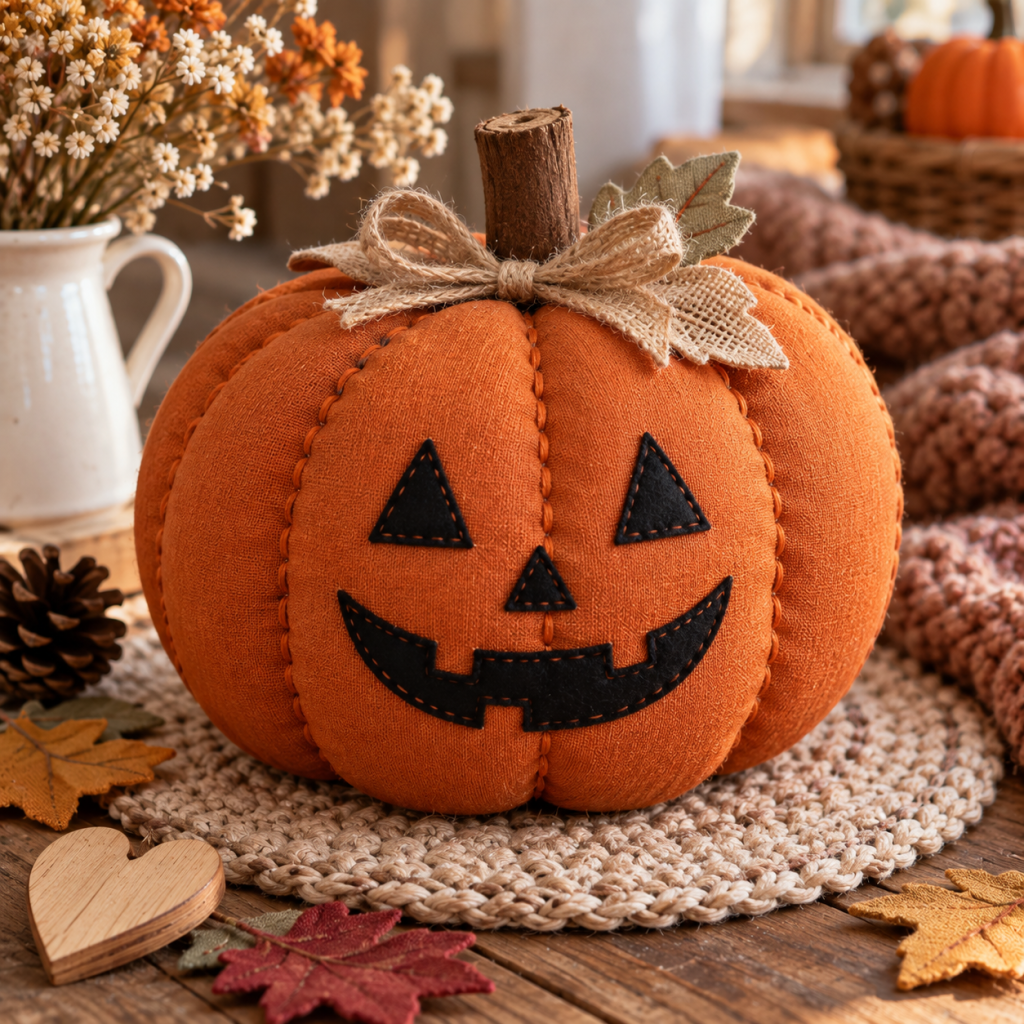
Add a face (optional). For a friendly jack-o’-lantern look, cut simple triangle eyes and a jagged mouth from black felt and hand-stitch or glue them onto the front of the pumpkin. Alternatively, draw a face directly onto the fabric with a fabric marker for a quicker finish, or leave it faceless for an elegant, decor-only pumpkin.
Personalize it further. Add a small raffia or burlap bow at the base of the stem, glue on a few fabric leaves, or dust the fabric lightly with cinnamon for a subtle autumn scent.
Styling Ideas for Your Fabric Pumpkin
- Make a graduated patch sew 3–5 pumpkins in different sizes and shades of orange for a layered display.
- Mix textures combine velvet, burlap, and plaid pumpkins together for a rich, cozy fall vignette.
- Turn it into a gift pair a handmade pumpkin with a jar of cinnamon or a fall candle for an easy, budget-friendly Halloween gift basket.
- Use it as a photo prop a soft pumpkin plush makes an adorable seasonal photo prop for kids or pets.
Quick Tips for Success
- Stuff the pumpkin firmly and evenly loose stuffing makes the ridge lines look uneven or lopsided.
- Use strong thread (or double up regular thread) for the ridge stitching, since it needs to hold tension without snapping.
- A slightly flattened, squat circle (rather than a perfect ball) creates a more realistic pumpkin silhouette.
- Keep your circle pattern to make a whole “patch” of pumpkins in various sizes and fabrics.
Frequently Asked Questions
What’s the best fabric for a DIY pumpkin?
Cotton, felt, and light velvet all work well since they’re stable and hold the ridged shape nicely. Avoid very stretchy or slippery fabrics, which can distort the seams.
Do I need a sewing machine to make this?
Not at all this entire project can be hand-sewn from start to finish using a simple running stitch and backstitch.
How do I get the pumpkin’s ridged shape without a special pattern?
Simply stitch strong thread from the top to the bottom of a firmly stuffed circle in several evenly spaced lines, pulling each one taut this creates the classic segmented look with no extra pattern pieces needed.
How long does this project take?
For a beginner, expect about 45–60 minutes from start to finish, not including drying time if you use fabric glue for the face or stem.
Can I make these in bulk for gifts?
Yes since the pattern is just a simple circle, it’s easy to batch-cut several pumpkins at once in different fabrics and sizes for gifting or craft fair sales.
A handmade fabric pumpkin is proof that the simplest sewing projects often make the biggest seasonal impact. With just a circle of fabric, some stuffing, and a few pulled stitches, you’ll have a charming, reusable Halloween decoration or heartfelt handmade gift ready to bring out every fall for years to come.