
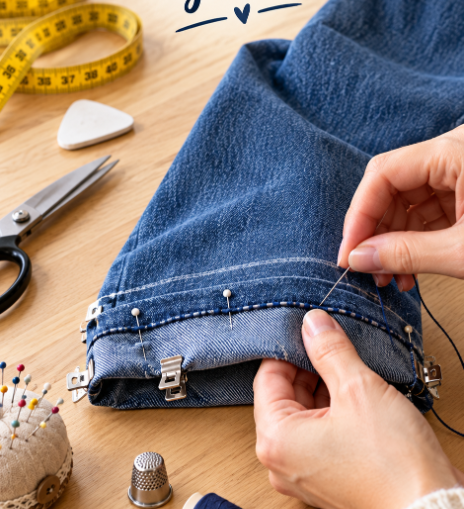
You found the perfect pair of jeans. The fit is great, the wash is exactly what you wanted, and then you try them on and the legs pool around your ankles. It is one of the most common fit problems there is, and most people assume the only fix is a trip to the tailor or a sewing machine they don’t own.
The good news is that you can hem jeans by hand at home with nothing more than a needle, strong thread, and a little patience. Hand sewing gives you more control than a machine, it is quiet, portable, and forgiving for beginners. In this guide you will learn how to measure the right length, mark it accurately, fold and pin the hem, and stitch it so it stays put wash after wash.
Why Hem Jeans by Hand?
Hand hemming is often overlooked, but it has real advantages:
- No machine needed. Denim is thick, and many home machines struggle with the side seams. By hand, you simply work through the layers at your own pace.
- Full control. You decide exactly where every stitch goes, which makes it easier to keep the hem straight and even.
- Budget friendly. A basic hand sewing kit costs a fraction of a tailor’s fee, and you can reuse it for every pair of pants in the house.
- Great beginner project. Hemming teaches the basics of measuring, marking and stitching that you will use in almost every sewing project.
What You Will Need
Gather everything before you start so you are not hunting for supplies halfway through:
- The jeans you want to shorten
- A measuring tape or ruler
- Tailor’s chalk, a fabric marker, or a sliver of dry soap
- Straight pins or sewing clips (clips work especially well on thick denim)
- A sturdy hand sewing needle (a denim or heavy-duty needle is ideal)
- Strong thread, such as all-purpose polyester or jeans thread, in a matching color
- Fabric scissors
- A thimble (optional, but it saves your fingers when pushing through denim)
- An iron (optional, for sharp, flat folds)
Step 1: Decide How Much to Shorten
Put the jeans on with the shoes you plan to wear most often with them. Shoe height changes the ideal length more than most people expect, so this step matters.
Stand in front of a mirror and fold the bottom of each leg up until it reaches the length you like. Ask someone to help if possible, since bending down to check will change where the fabric falls. Once you are happy, place a pin at the new length on each leg.
Step 2: Calculate Your Measurements
Take the jeans off and measure the distance from the current bottom edge to the pin. This number is the amount you want to remove from the visible length.
Now add a hem allowance. This is the extra fabric that will be folded inside the leg to create the finished hem. For denim, a hem allowance of about 1 inch (2.5 cm) is a comfortable, common choice. Write both numbers down so you do not have to rely on memory:
- Amount to shorten: the distance you measured
- Hem allowance: the extra fabric that will be folded inside
Measure both legs separately. Legs are not always exactly equal, and your body may not be perfectly symmetrical either.
Step 3: Turn the Jeans Inside Out
Turn the jeans inside out. All of your marking, folding and stitching will happen on the wrong side of the fabric, so your lines and stitches stay hidden when the jeans are worn.
Lay one leg flat on a table with the side seams lined up, and smooth out any wrinkles so your measurements stay accurate.
Step 4: Mark the New Length Again
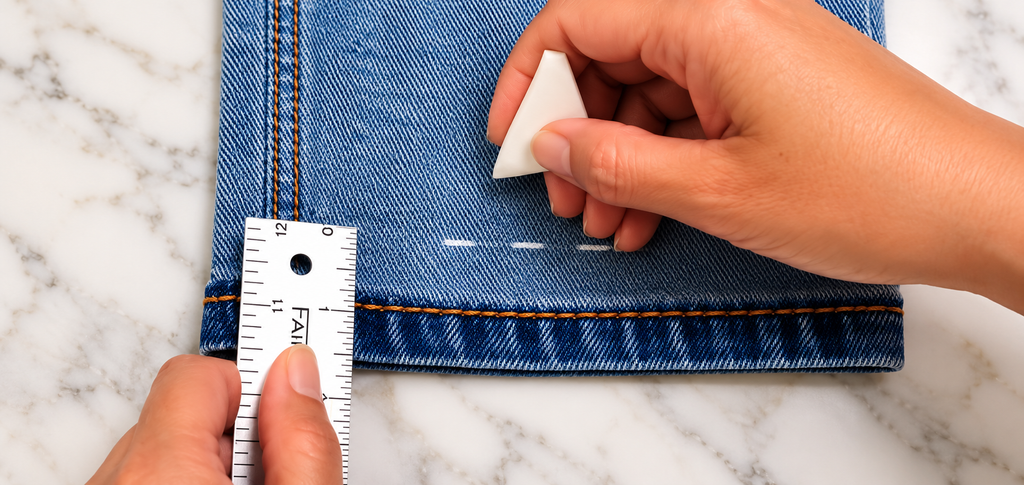
Using your notes, measure up from the bottom edge and mark the new length on the inside of the leg with chalk. Make several small marks around the leg, on the front, the back and near both side seams.
Checking your length a second time on the inside may feel repetitive, but it is the best way to catch small errors before they become permanent. It is much easier to fix a chalk mark than a finished hem.
Step 5: Draw a Straight Guide Line
Connect your marks with a ruler to draw one clear, continuous line all the way around the leg. This is your fold line, and it will become the bottom edge of your finished jeans.
Keep the line parallel to the original hem. If the line wobbles, your hem will look uneven, so take your time here.
Step 6: Fold the Fabric Inward
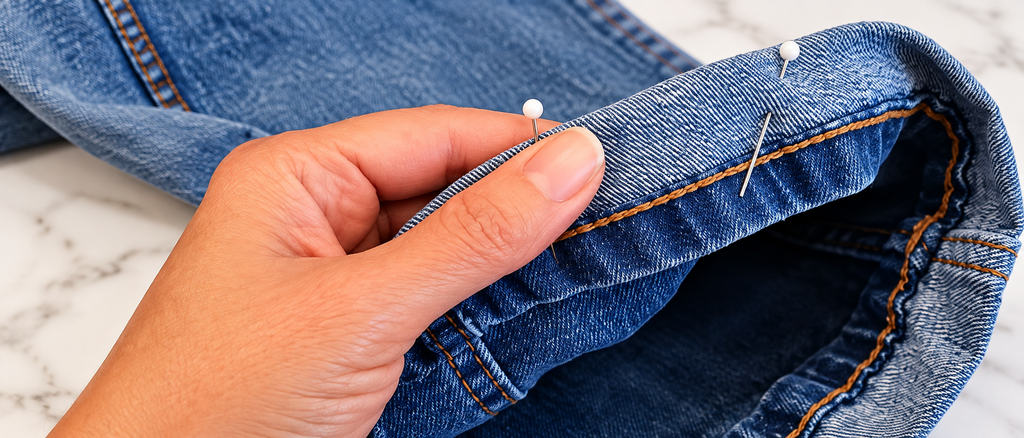
Fold the extra fabric up toward the inside of the leg, exactly along the line you drew. The chalk line should sit right at the fold.
If you have an iron, press the fold firmly. A crisp fold is much easier to stitch and gives a neater, more professional finish. Denim holds a pressed crease very well.
Step 7: Pin the Hem in Place
Pin or clip the folded hem all the way around the leg, placing a pin every 2 to 3 inches (5 to 7 cm). Pay extra attention around the side seams, where the fabric is thickest and most likely to shift.
Before sewing, turn the leg right side out for a moment and check the length and evenness. If anything looks off, now is the time to adjust.
Step 8: Stitch the Hem by Hand
Thread your needle with a comfortable length of thread, about arm’s length, and knot the end. Start at a side seam, where your knot and first stitches will be least visible.
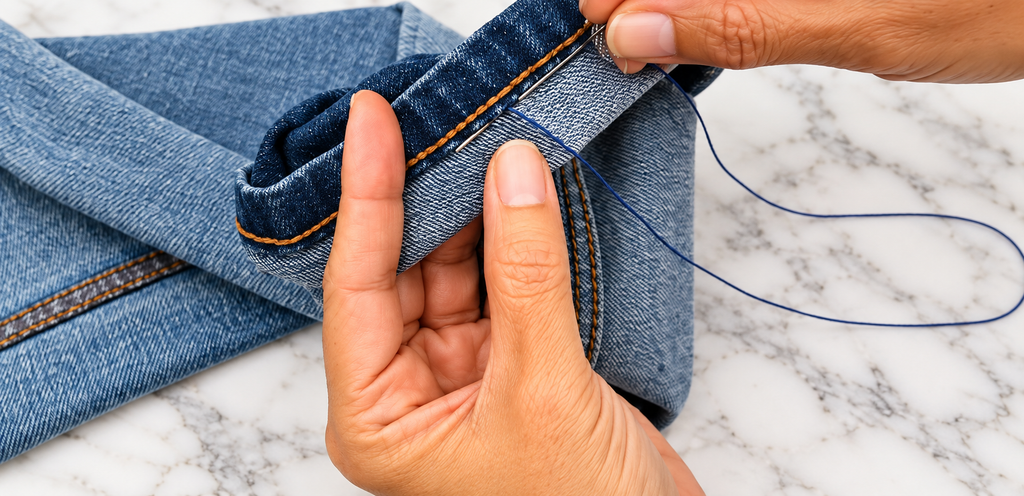
Two hand stitches work well for jeans:
- Backstitch: very strong and durable, great if you want a hem that will survive heavy wear and frequent washing.
- Blind hem stitch (slip stitch): almost invisible from the outside, ideal if you want a clean finish that does not show.
Whichever you choose, keep your stitches small and evenly spaced, and do not pull the thread too tight, which can pucker the denim. When you get to the side seams, work slowly and use a thimble to push the needle through the thick layers.
When you have stitched all the way around, finish with a few small stitches in the same spot and tie a secure knot on the inside.
Step 9: Secure the Folded Fabric Inside with a Hidden Stitch
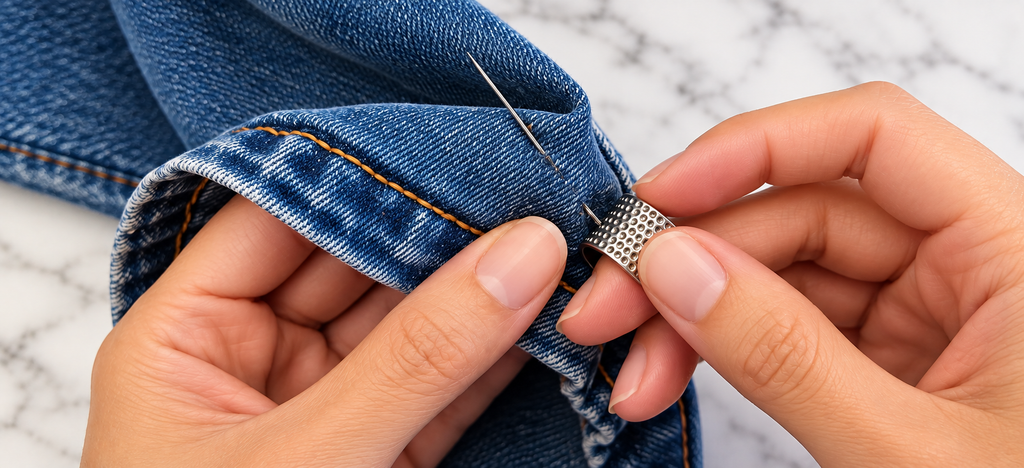
Once the hem is stitched, there is still one important detail left: the extra fabric folded inside the leg. If it is left loose, it can slip down, bunch up, or twist while you wear and wash your jeans. This step tacks it neatly to the inside of the leg with an invisible stitch, so the hem stays flat and comfortable.
1. Match your thread perfectly.
Use a thread that is exactly the same color as the outside of your denim. Even though the stitches are designed to stay hidden, a perfect color match makes sure nothing shows if a tiny stitch catches the surface.
2. Take tiny stitches that don’t show on the outside.
Bring the needle up through the edge of the folded fabric inside the leg. Then take a very small stitch, just a few threads, from the outer denim, running parallel to the weave of the fabric. Pick up only the surface fibers without going all the way through, so the stitch stays invisible from the right side.
3. Work in a light zigzag (catch stitch).
Move forward and backward in a gentle zigzag between the folded edge and the outer denim, alternating one stitch on the fold and one stitch on the jeans. This is known as the catch stitch or Z-stitch. Its crisscross pattern holds the fold firmly while still allowing the denim a little stretch, so the stitches don’t snap when you move.
4. Go slowly over the side seams.
The side seams are the thickest part of the leg, with several layers of denim stacked together. Work through them one stitch at a time, push the needle carefully, and use a thimble to protect your fingers. Never force the needle, since it can bend or break in heavy denim.
5. Knot and trim.
When you have gone all the way around the leg, take a couple of small stitches in the same spot, tie a secure knot on the inside, and trim the thread close to the knot.
Why this step matters: A hem that is only stitched along the fold can still let the inner fabric shift or fold over on itself. Catch-stitching it in place keeps the inside smooth, prevents bulk, and helps your hem look neat and professional for much longer.
Step 9: Finish and Repeat
Remove the pins, give the hem a final press, and turn the jeans right side out. Then repeat every step on the second leg, using that leg’s own measurements.
Try the jeans on with your chosen shoes one last time to confirm that both legs match.
Tips for a Clean, Professional Hand Hem
- Measure twice, sew once. Most hemming mistakes come from rushing the measuring and marking stages.
- Match your thread. A thread color close to the denim hides small imperfections.
- Use clips on thick seams. Pins can bend or slip on denim, while sewing clips hold multiple layers firmly.
- Keep an eye on bulk. If the folded fabric is very bulky, trimming some of the excess inside the hem can make stitching easier and the hem lie flatter.
- Press as you go. Ironing each fold makes the next step easier and the finish sharper.
- Work in good light. Dark denim makes stitches hard to see, so sew near a window or a bright lamp.
Common Mistakes to Avoid
- Measuring without shoes. The length can end up too short or too long once you put your shoes on.
- Assuming both legs are the same. Always measure and mark each leg separately.
- Drawing a crooked line. An uneven guide line means an uneven hem.
- Pulling stitches too tight. Tight stitches pucker the fabric and make the hem look wavy.
- Skipping the pinning check. Always check the length with the hem pinned before you start stitching.
Frequently Asked Questions
Can you really hem jeans by hand without a sewing machine?
Yes. Hand stitching is completely strong enough for jeans when you use sturdy thread and a strong stitch like the backstitch. It takes longer than a machine, but the result can be just as durable.
How long does it take to hem jeans by hand?
Most beginners finish a pair in about one to two hours, including measuring and marking. It gets much faster with practice.
What is the best stitch for hemming jeans by hand?
The backstitch is the strongest option for everyday jeans. If you want the stitches to be nearly invisible from the outside, use a blind hem stitch instead.
What thread should I use for hemming jeans?
Use a strong polyester thread or a thread made for denim. Regular cotton thread is weaker and can break with frequent wear and washing.
How much fabric should I leave for the hem?
A hem allowance of about 1 inch (2.5 cm) works well for most jeans. It gives you enough fabric to fold inside and stitch securely without adding too much bulk.
Do I need to iron the hem?
It is optional, but pressing the fold makes it much easier to sew and gives a neater, flatter finish.
Conclusion
Learning how to hem jeans by hand is one of the most useful sewing skills you can pick up. With a measuring tape, some chalk, pins, a needle and strong thread, you can turn jeans that are too long into a pair that fits exactly the way you want, without a sewing machine or a tailor.
The secret is in the preparation: measure carefully, mark your line twice, fold and pin neatly, and take your time with the stitches. Once you have done it once, you will be able to hem every pair of pants in your closet with confidence.
Save this guide for your next pair of jeans, and share it with a friend who has been living with pants that are just a little too long.